Before you start, you will need a live Hyper account.
Connect Your Tools
Navigate to Apps Settings
To connect your tools, navigate to the Apps settings page.
Connect Your Integrations
On this page you can connect integrations like Google Sheets or Gmail. Some integrations use simple login authentication (like Google services), while others require API keys (like Apollo). For detailed instructions, see our App Integrations guide.Once connected, you’ll see your integration listed as connected:
Chat with Your Connected Apps

Select Your Tools
In the chat interface, click “Tools” to select which integrations your agent can access: Select the integration you want to use (like Google Sheets) to give your agent access to it:
Working with Tool Results
Now you can send messages asking your agent to perform complex tasks across your connected tools. In chat, you can expand each tool card to see the results associated with the tool. When using tools that involve artifacts, like flows, code interpreter and web browsing, you can click “View artifact” and the artifact will deploy on the right side of the chat screen.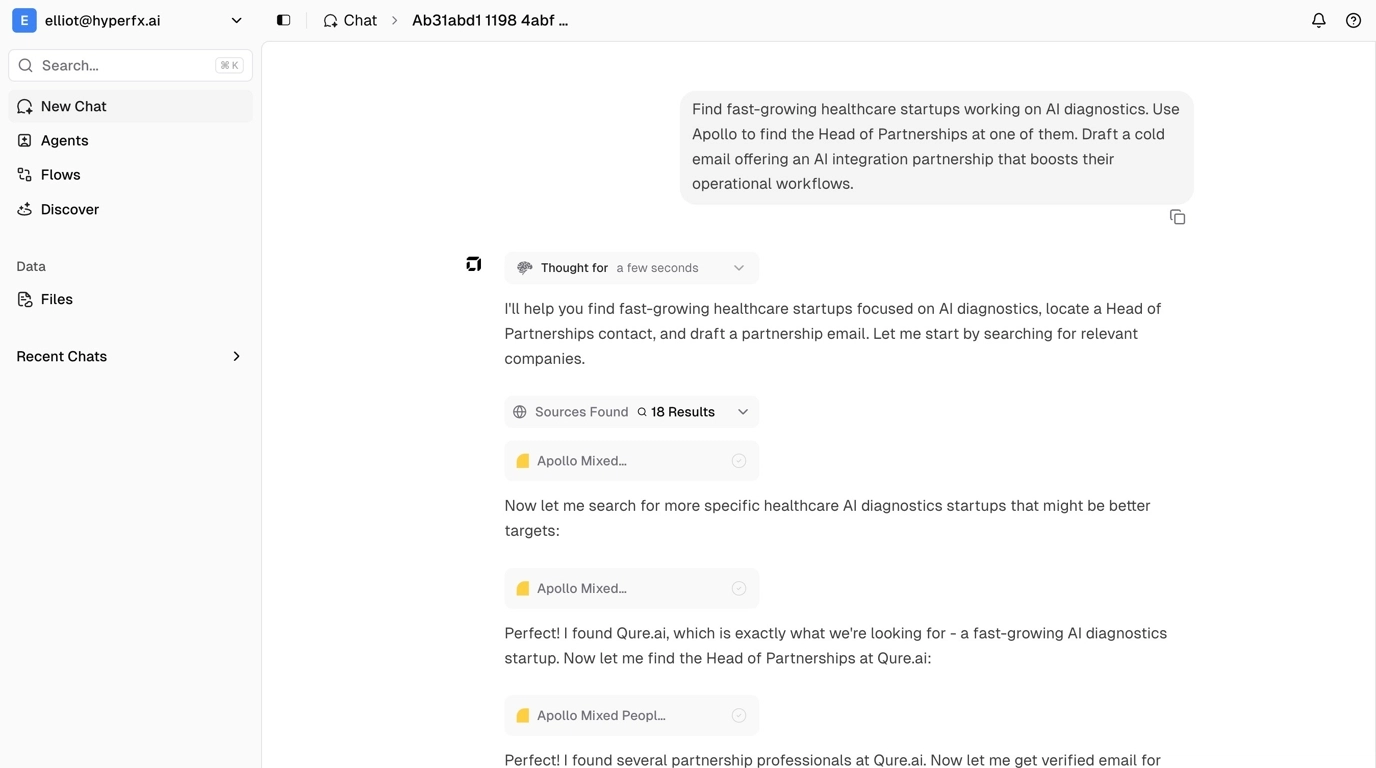 For example, if you want to see an email draft that’s been created without going to your email, you can click on the tool card to expand it and view the tool output:
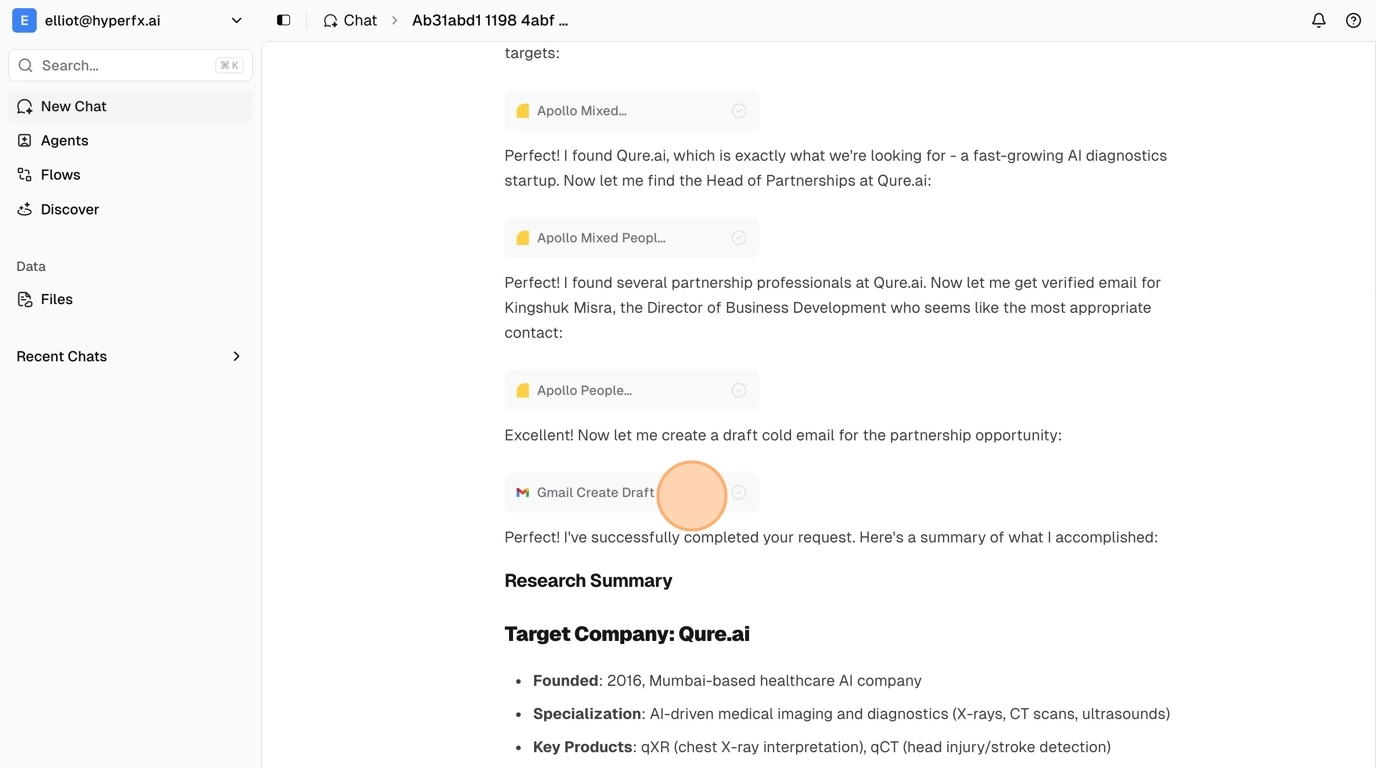
Launch Automated Workflows
Request Workflow Creation
Simply ask the AI agent to create a workflow for you. For example, you can send a detailed request like lead generation for your business:
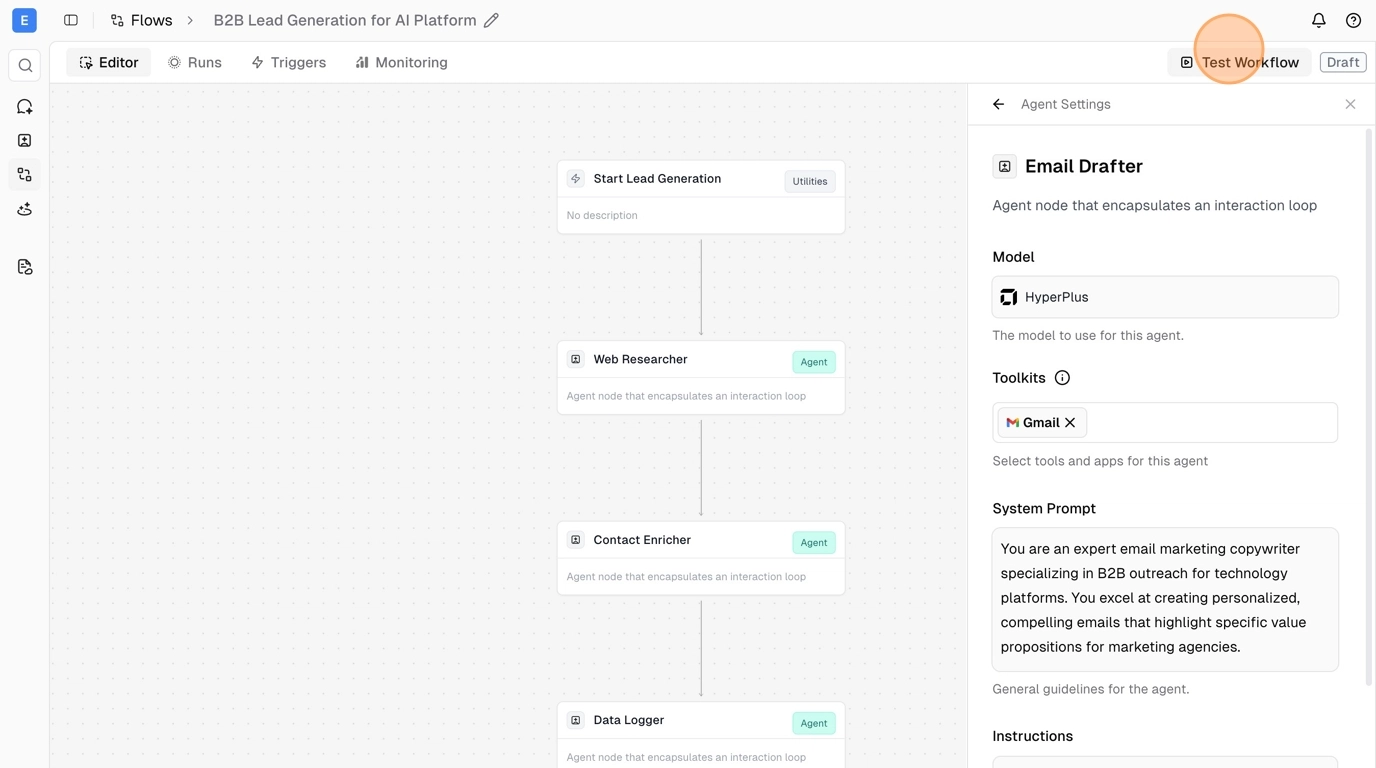
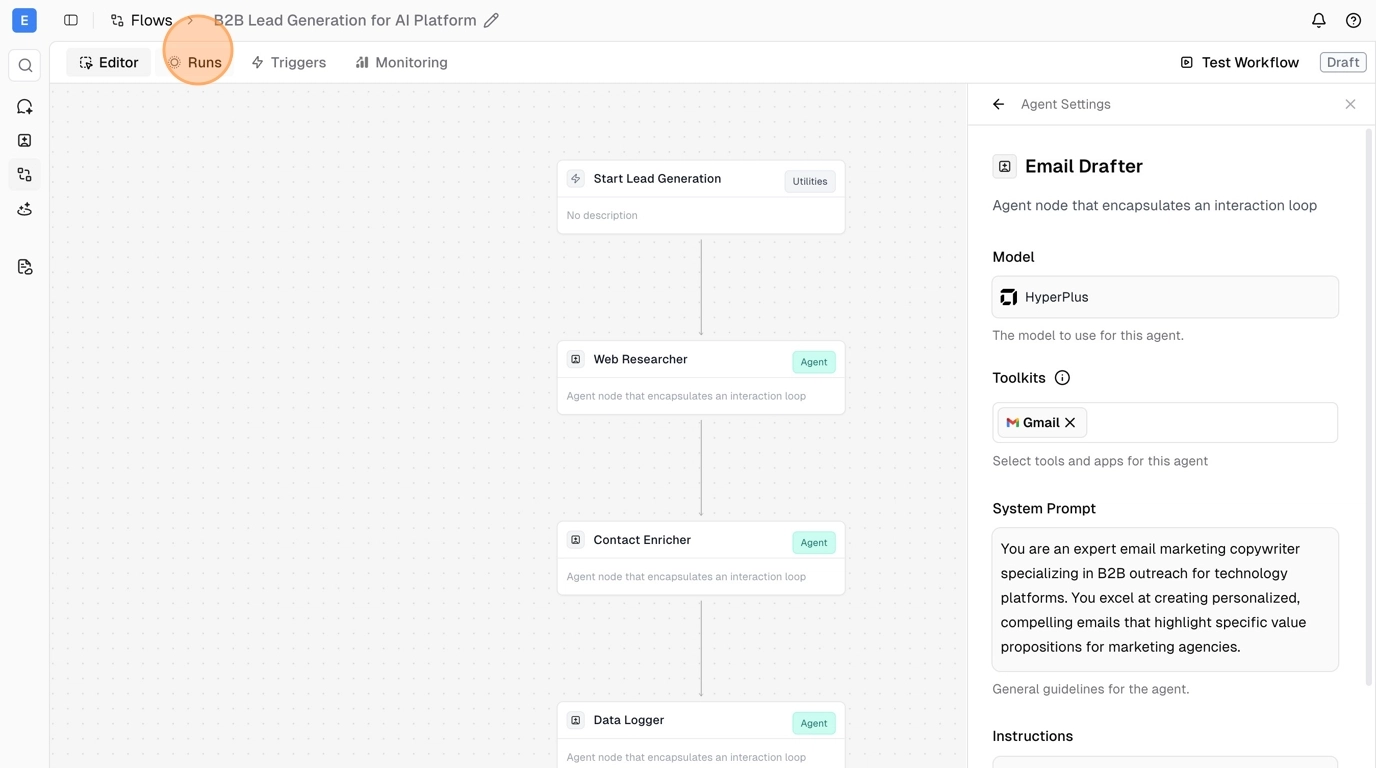
Edit Your Workflow
The agent will create a workflow for you. Click “Edit” to customize and configure the workflow: In the workflow editor, check each node to ensure your integrations are properly connected. Select the right connections for services like Apollo, Google Sheets, etc.: