What are Flows?
Flows are multi-step automated workflows that execute tasks across your connected apps. You can either ask your agent to create workflows automatically in chat by enabling the flows tool, or build them manually using our drag-and-drop visual editor. Flows can:- Connect multiple apps to create seamless data pipelines
- Run automatically based on triggers like schedules, webhooks, or app events
- Process data between different systems with AI agents
- Handle complex logic with conditional branches and multi-step sequences
Key Components
Triggers
- Schedule: Run flows at specific times (every minute, hourly, daily, weekly, monthly)
- Webhook: Trigger flows from external systems via API
- Message: Trigger from chat or external messages
- Manual: Start flows on-demand
- App Events: React to changes in connected apps (coming soon)
Actions & Agents
- Agents - Have access to tools and can make intelligent decisions
- Tools - More programmatic, direct actions to read/write data
- Transform - Process and format data between steps
- Notify - Send alerts or messages
Monitoring
- Execution Logs: See detailed logs of each flow run
- Error Handling: Built-in retry logic and error notifications
- Performance Metrics: Track success rates and execution times
Getting Started
Before you start, ensure you have at least one app connected in Settings → Apps.
Building Your First Flow
Access the Flow Builder
Navigate to https://app.hyperfx.ai/flows where you can see all your flows, active workflows, scheduled runs, and credit usage. In the flow table, you can see each flow’s status - flows must be Live/Active to run, which you do by publishing the flow. Click “Create Flow” to start building your first workflow.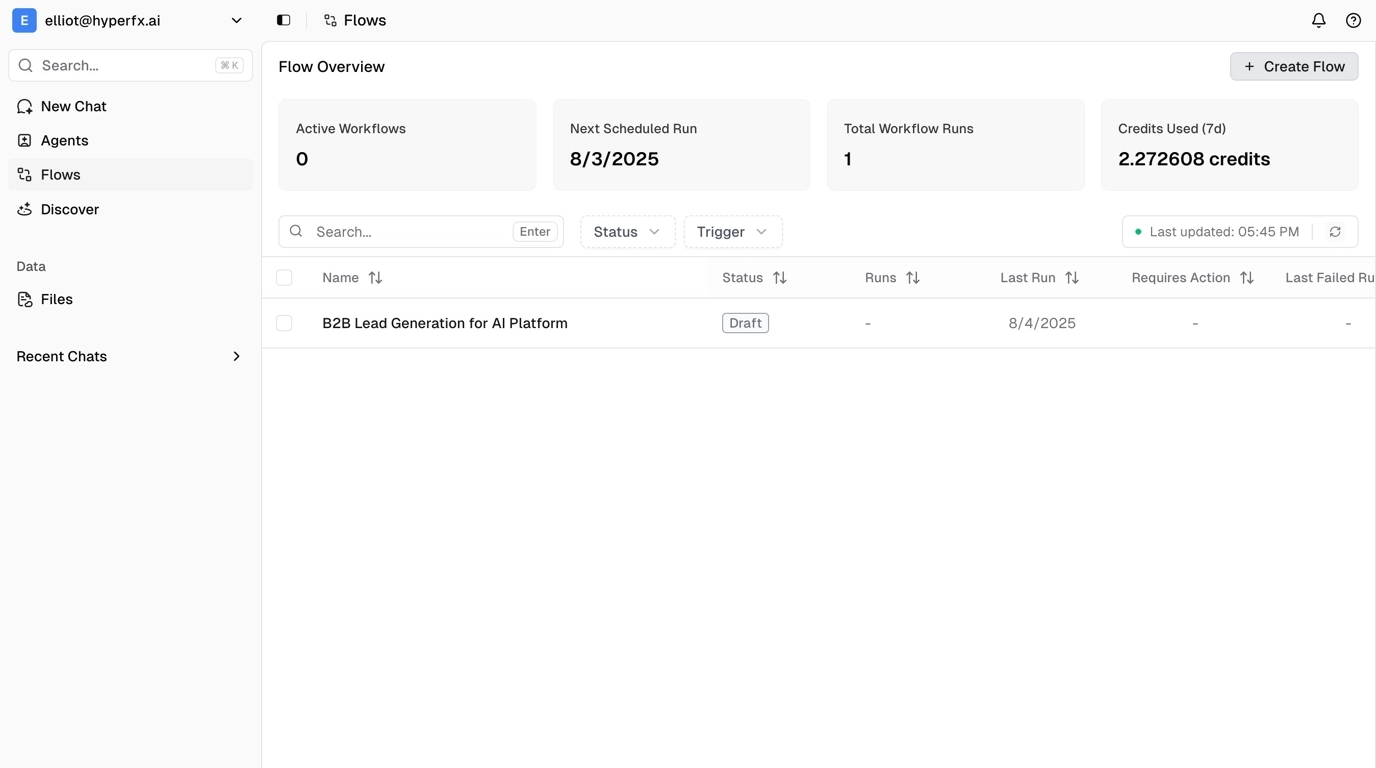
Configure Your Workflow
In the workflow settings panel, you can name your workflow, add a description, and quickly access your available nodes. You can navigate between nodes either by clicking them in the editor or from the settings panel.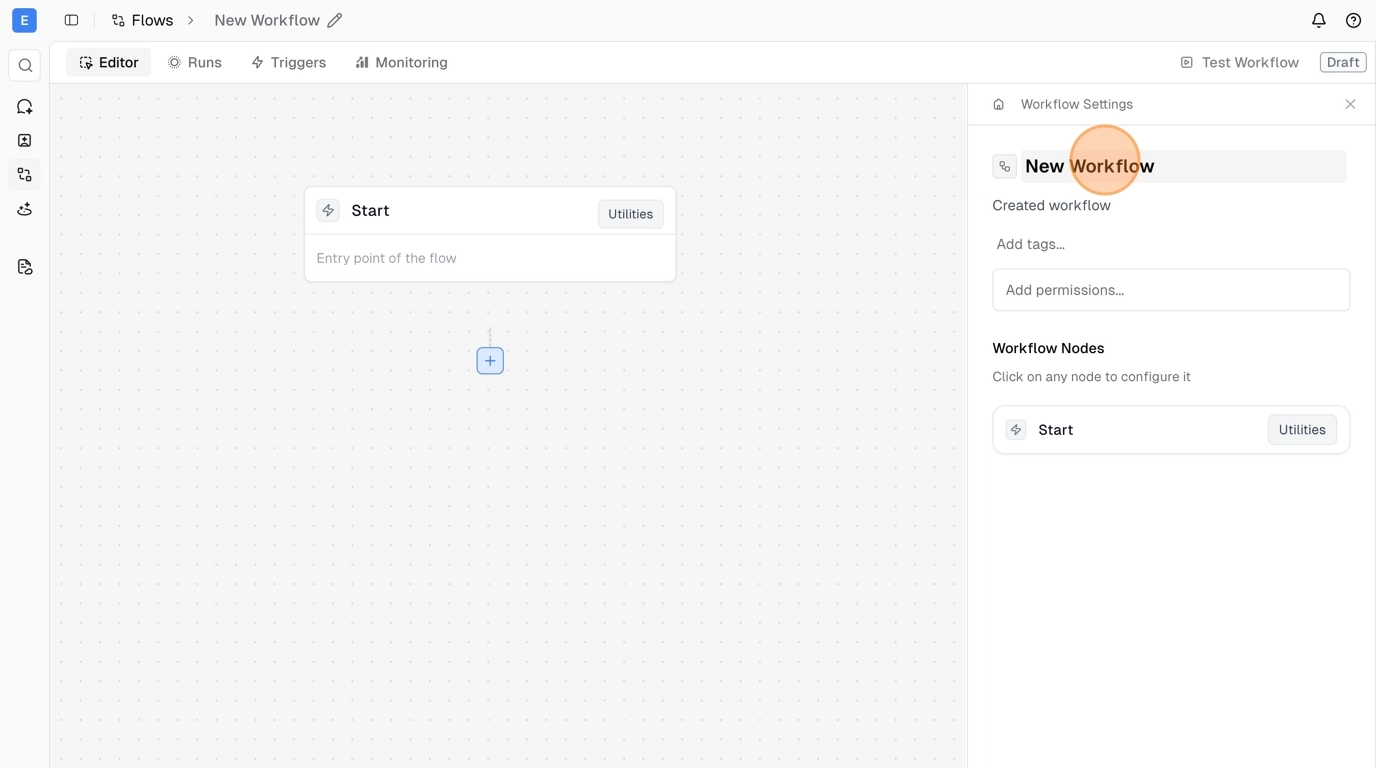
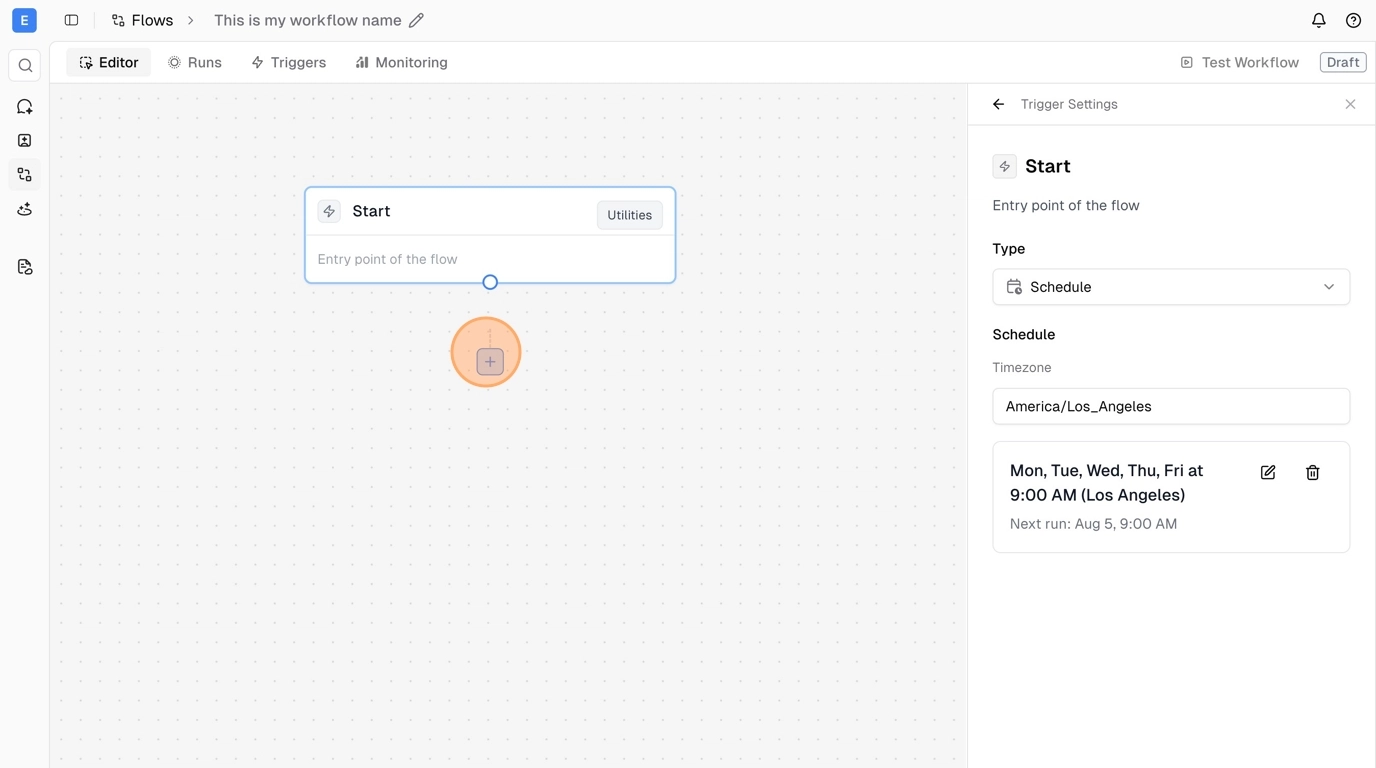
Set Up Your Trigger
Click on the trigger node (Start node) to configure when your workflow should run. You can choose between different trigger types like Schedule, Message, Webhook, or Manual.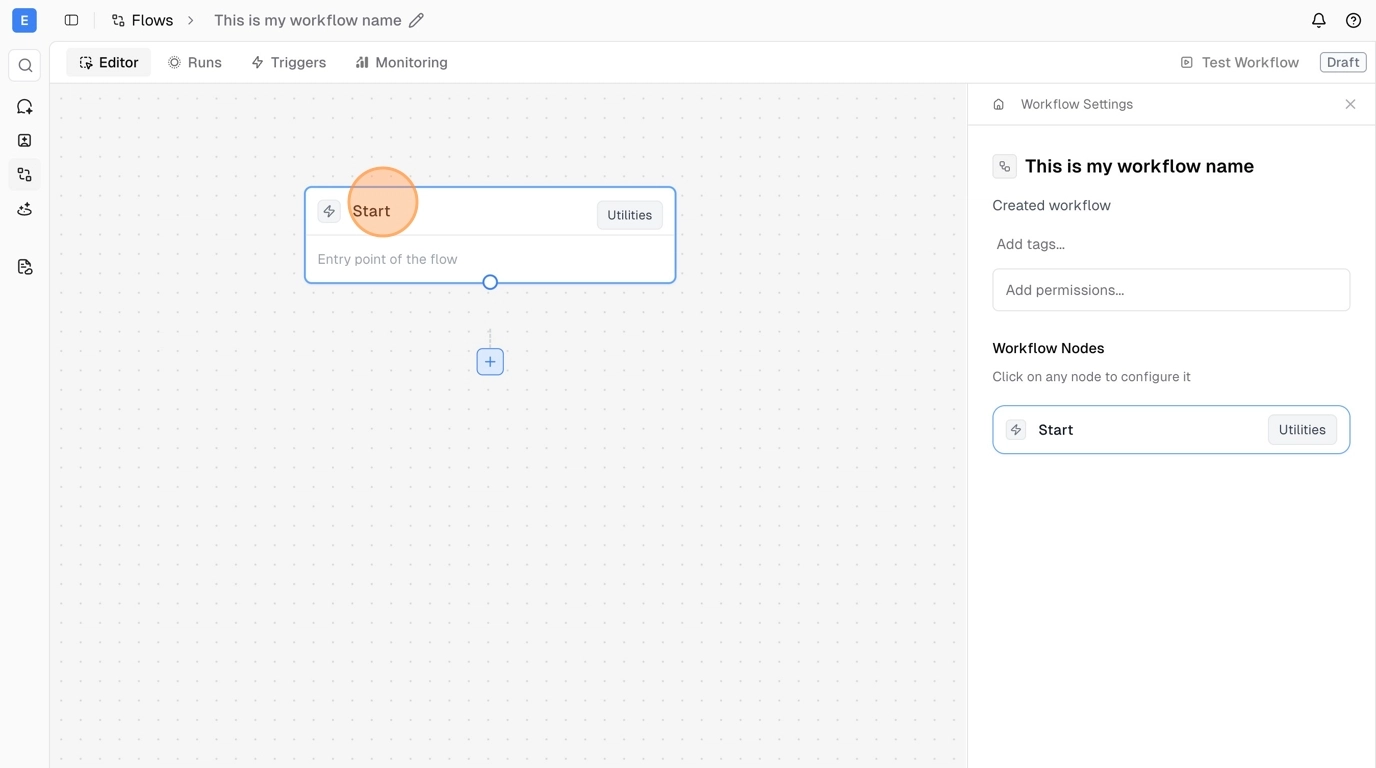
Adding Steps to Your Workflow
To add steps to your workflow, click the blue + on any node or use the + in the flow dock at the bottom of the editor. You can choose between:- Agents - Have access to tools and can make intelligent decisions
- Tools - More programmatic, direct actions
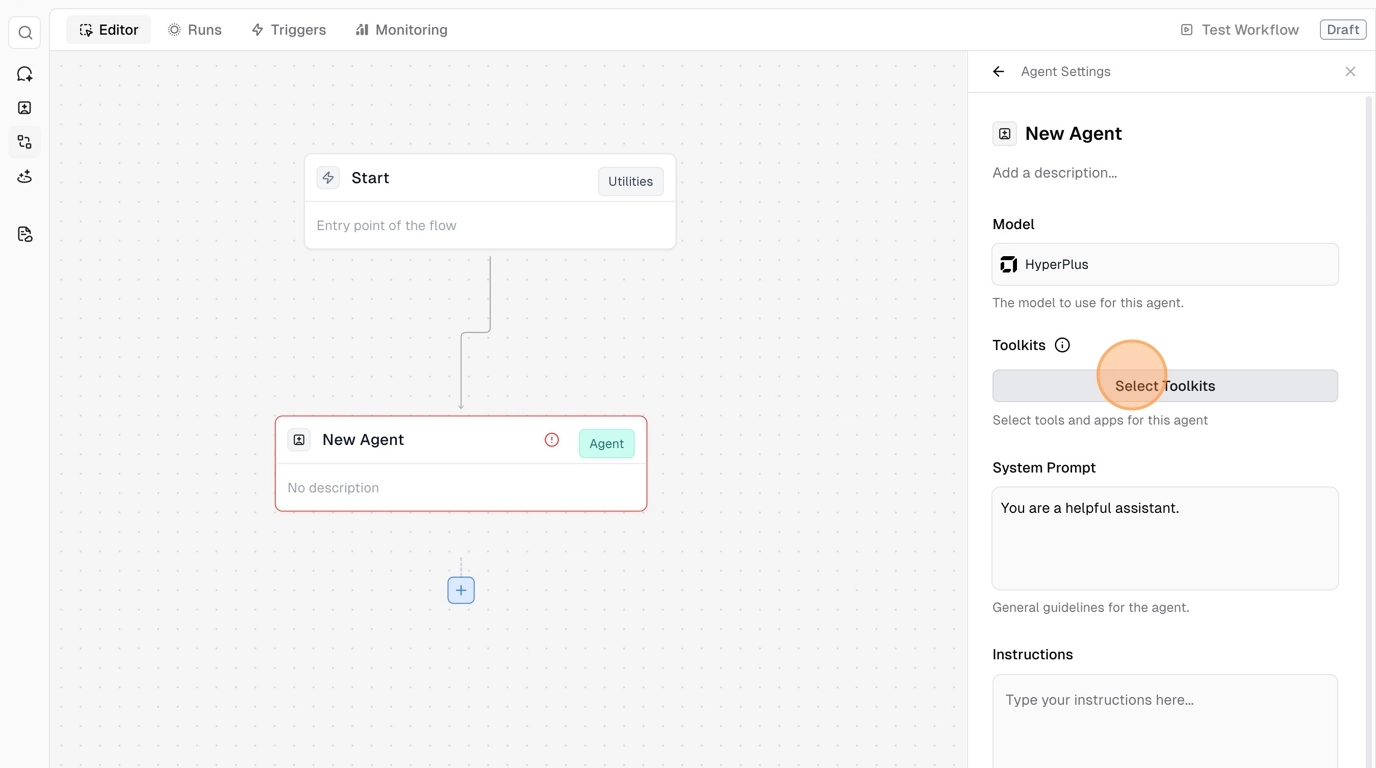
Configure Agent Settings
When you add an Agent node, you can configure which tools it has access to:- Select Toolkits - Choose which integrations the agent can use
- Select Connection - Choose which specific account connection to use
- Set Approval Requirements - Decide if certain actions require human approval
Add Instructions
In the agent panel, add your system prompt and instructions. For example: “Check my Gmail for any emails that require a response, and go ahead and respond for me.”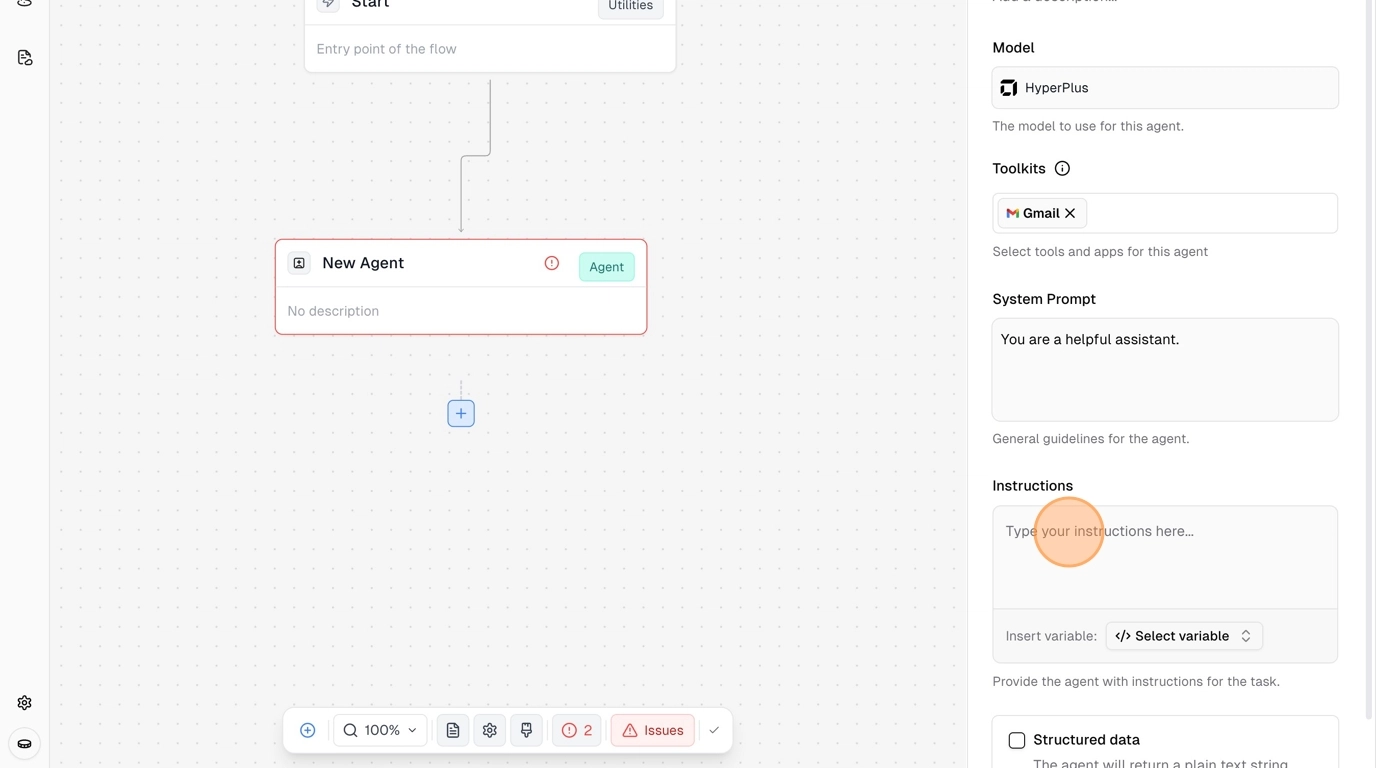
Test and Deploy
Test Your Workflow
Click “Test Workflow” in the top right, then “Run Workflow Test”. Even if your trigger is set to schedule, the test will run immediately.
Monitor Your Runs
Click “Runs” to view your workflow execution history. You can see the event history, click on specific runs to view details, and monitor your agent’s progress in real-time.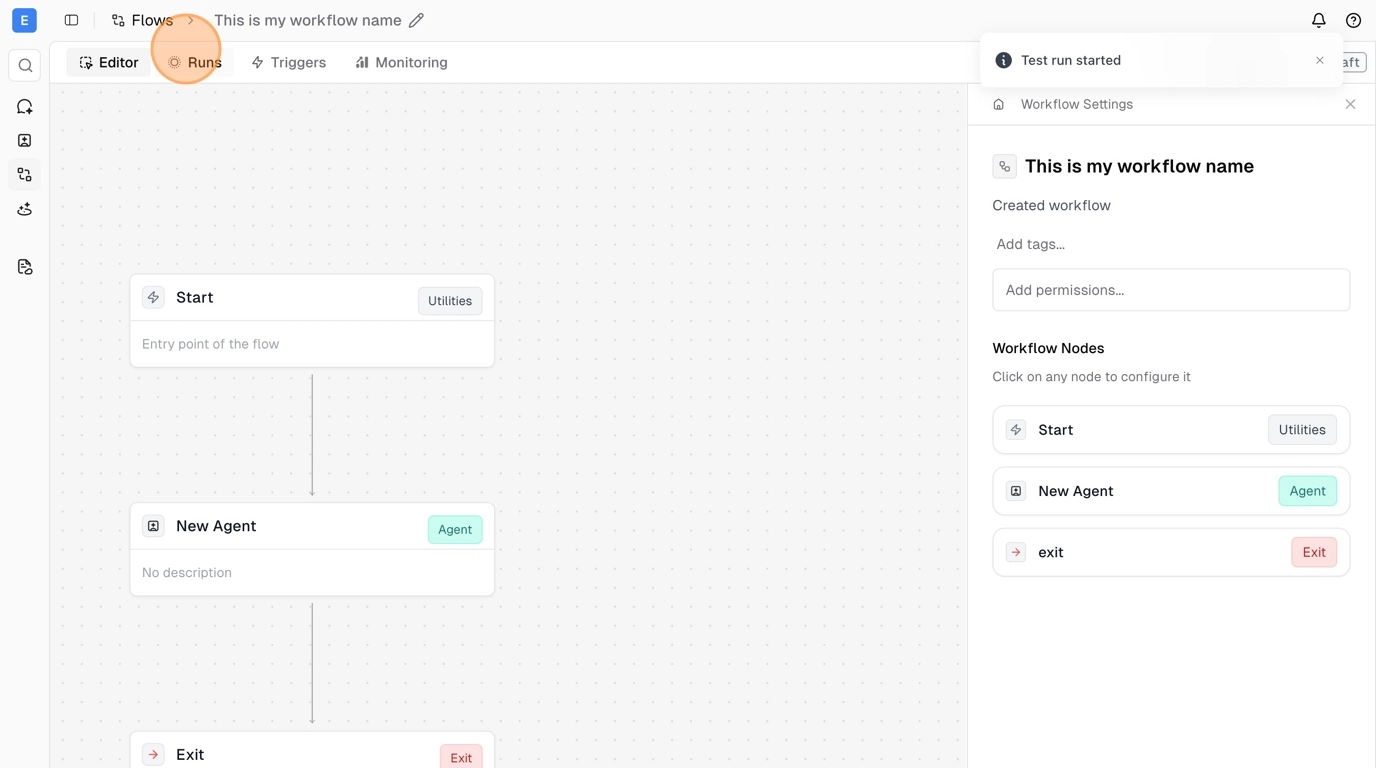
Publish Your Workflow
When you’re ready to go live, return to the editor and click “Publish” in the bottom dock. This is essential - your workflow will not run automatically until it’s published.
Triggers: Configure When Workflows Execute
Triggers determine when your workflows execute. Choose from schedule-based, event-driven, or manual triggers to automate your business processes.Available Trigger Types
Schedule TriggersRun workflows at specific times with flexible scheduling options. Example uses:
- Daily sales reports at 9 AM
- Weekly data backups every Friday
- Monthly invoice processing
Execute workflows when triggered from chat or external messages. Example uses:
- Process requests from team chat
- Handle customer service inquiries
- Execute tasks from voice commands
Trigger workflows from external systems via HTTP requests. Example uses:
- New form submissions on your website
- Payment processing notifications
- Third-party system integrations
Run workflows on-demand when you need them. Example uses:
- One-time data processing tasks
- Ad-hoc report generation
- Testing and debugging workflows
Schedule Configuration
When setting up schedule triggers, you can configure:- Frequency: Every minute, hourly, daily, weekly, or monthly
- Time Zone: Adjust for your local time zone
- Specific Times: Set exact execution times
- Days of Week: Choose specific days for weekly schedules
- Advanced Patterns: Custom scheduling for complex requirements
Webhook Setup
For webhook triggers:- Generate Webhook URL: Get a unique URL for your workflow
- Configure Authentication: Set up security tokens if needed
- Define Payload Structure: Specify expected data format
- Test Integration: Verify external systems can trigger your workflow
Coming Soon: Additional Trigger Types
We’re actively developing additional trigger types:- Event-Based Triggers: React to changes in connected apps
- Form Submission Triggers: Trigger from lead capture forms
- File Upload Triggers: Process files when uploaded
- Email Receipt Triggers: Respond to specific emails
- Database Change Triggers: React to data modifications
Actions: Building Workflow Steps
Actions are the building blocks of your workflows. Choose between AI agents that can make intelligent decisions and direct tools for programmatic tasks.Action Types
AI AgentsIntelligent assistants that can access multiple tools and make decisions. Capabilities:
- Access to multiple integrations simultaneously
- Natural language processing and decision-making
- Context awareness across workflow steps
- Ability to handle complex, multi-step tasks
Direct, programmatic actions for specific tasks. Capabilities:
- Precise, deterministic operations
- Fast execution for simple tasks
- Direct API calls to connected apps
- Structured data processing
Configuring AI Agents
Give your agent access to the tools it needs:- Select Toolkits: Choose integrations like Gmail, HubSpot, Google Sheets
- Choose Connections: Select which specific accounts to use
- Set Permissions: Configure read/write access levels
Approval Requirements
Control sensitive operations by requiring human approval:- Email Sending: Approve outbound messages
- Data Deletion: Confirm destructive operations
- Financial Actions: Verify payment processing
- External Communications: Review customer-facing content
System Instructions
Provide clear instructions for your agent: Example Instructions:- “Check my Gmail for any emails that require a response, and go ahead and respond for me”
- “Analyze sales data from Google Sheets and create a summary report”
- “Find new leads in HubSpot and send personalized LinkedIn connection requests”
Workflow Architecture
Sequential ActionsCreate linear workflows where each action depends on the previous:
Execute multiple actions simultaneously for efficiency:
Add decision points based on data or outcomes:
Complex Workflow Examples
Lead Processing Pipeline- Apollo Tool: Find new prospects
- Agent: Analyze and qualify leads
- Google Sheets Tool: Add to CRM
- Gmail Agent: Send personalized outreach
- HubSpot Tool: Create follow-up tasks
- Web Search Tool: Find trending topics
- Agent: Generate content ideas
- Image Generation Tool: Create visuals
- LinkedIn Agent: Write and schedule posts
- Analytics Tool: Track performance
- Gmail Tool: Monitor support inbox
- Agent: Categorize and prioritize tickets
- Knowledge Base Tool: Find relevant solutions
- Agent: Draft personalized responses
- CRM Tool: Update customer records
Exit Nodes
Every workflow must end with an Exit node to properly complete execution. You can use success exits for normal completion, error exits for failure scenarios, or conditional exits with different endpoints based on workflow outcomes.Runs: Viewing Execution History
The Runs tab shows the execution history for your specific workflow. Click on any run to see detailed step-by-step execution information.Viewing Run History
From your workflow editor, click the Runs tab to see all executions for this specific workflow. Each run shows the status, when it was triggered, how long it took, and what triggered it (manual, schedule, webhook, etc.).Run Details
Click on any run entry to see detailed execution information including what each step did, any errors that occurred, and the data that was processed. On the run detail page, you’ll see the version of your workflow at the time it ran on the left side, and you can click on individual nodes to see exactly what happened in that specific step rather than viewing everything at once. Test runs are clearly marked and show full debugging information to help you optimize your workflow.Understanding Run Status
Successful ✅ runs completed without errors and achieved their intended results. Failed ❌ runs encountered problems during execution, usually due to integration issues, data problems, or unclear agent instructions. In-Progress ⏳ runs are currently executing and show real-time progress. Test runs execute immediately when you click “Test Workflow” and are safe for experimentation and validation.Optimizing Your Workflows
Watching your runs is one of the best ways to see if things are going well or if you need to make changes. If you notice something happening that you don’t want, you can go back to the workflow editor and adjust the agent’s instructions or change tool access for specific steps. Use runs to identify slow steps, unclear agent decisions, or integration issues, then refine your workflow to improve performance and reliability.Monitoring: Track Performance & Optimize
Monitor your workflows in real-time to ensure optimal performance, track execution history, and identify opportunities for improvement.Monitoring Dashboard

- Uptime: Track workflow availability (e.g., 99.8% uptime)
- Run Statistics: Total runs with growth indicators (+8.2%)
- Duration Tracking: Average execution time with trends (-5ms improvement)
- Credit Usage: Resource consumption monitoring (+12.5% increase)
- Recent Alerts: Track failed runs and system health
- Tool Usage: Monitor tool calls across flow executions
- Run Charts: Visual representation of execution patterns over time
- Detailed Run History: Complete execution logs with timestamps and status
Real-Time Monitoring
Live Execution Tracking Watch your workflows execute in real-time:- Agent Progress: See which step your agent is currently executing
- Tool Outputs: View results as they’re generated
- Decision Points: Monitor agent reasoning and choices
- Error Detection: Immediate alerts when issues occur
- Average run duration
- Success/failure rates
- Resource utilization
- Queue wait times
- Tasks completed
- Data processed
- Integrations accessed
- Credits consumed
Alerts and Error Handling
Recent Alerts Dashboard- Monitor failed runs with “0 Failed - All Good!” status
- Track system health and workflow reliability
- Get immediate notifications when issues occur
- API rate limits or connection timeouts
- Invalid data formats or missing fields
- Agent instruction or logic errors
Best Practices for Monitoring
Choose the right trigger type based on your use case: schedules work best for regular, time-based tasks while webhooks are ideal for real-time integrations. Manual triggers are perfect for testing and one-off operations. Optimize performance by avoiding over-scheduling and using appropriate time intervals. Monitor execution patterns regularly and set realistic timeouts to ensure workflows run smoothly without overwhelming your systems. Secure your webhook endpoints with authentication tokens and validate all incoming data. Monitor for suspicious activity and implement proper security measures to protect your workflows from unauthorized access. Track trigger performance through success rates, execution timing, and error patterns. Monitor resource usage to identify optimization opportunities and ensure your triggers are performing efficiently across all workflow executions.Use Cases
Data Synchronization
Keep your apps in sync by automatically transferring data between systems on a schedule.Report Generation
Create automated reports that pull data from multiple sources, analyze with AI, and deliver results via email or Slack.Lead Management
Automatically route and process leads from various sources into your CRM with enrichment and follow-up sequences.Email Automation
Monitor your inbox, respond to specific types of emails, and route urgent messages to the right team members.Backup & Archival
Set up automated backups of important data across your connected apps to Google Drive or databases.Advanced Features
- Multi-step Workflows - Create complex 20+ step workflows with multiple agents and tools
- Conditional Logic - Add branches and decision points (coming soon)
- Error Handling - Built-in retry logic and error notifications
- Real-time Monitoring - Track execution and performance metrics
- Agent-Generated Flows - Have AI create workflows from chat, then customize in the editor